Soil is a vital part of making sure your plants thrive, may it be for farming, gardening, or what. Regardless of the plants, you’d like to grow, everyone needs good quality soil to do so.
But what if you want to avoid anything from growing, such as pathogens, weeds, fungus, and the like? The answer is sterilization!
Sterilization methods are often used when making potting soils to ensure they are free from unnecessary things, such as:
- Gnats and nematodes, which are tiny insects that make soil infertile
- Weeds that consume necessary nutrients and liquids from the soil
- Mold and fungus that prevents soil from staying moist
- Pathogens, such as different bacteria and viruses, which can destroy the soil’s fertility and affect plant growth
This is why it’s important to learn how to sterilize soil so nothing will grow. If you’re not familiar with how to do so, read on for my quick guide!
Why Sterilize Your Soil?
You have probably sterilized your soil before but didn’t know that the exact term or what it entailed. Commercial agriculturists and greenhouses would sterilize soil at certain frequencies, sometimes yearly or more if there is an attack of pests and/or diseases.
Sterilization of soil is beneficial as it would cost less than having to treat all crops and plants, along with the damage and productivity losses.
Soil sterilization will help make soil be in optimum condition to germinate seeds, propagate stem and shoot cuttings, along with helping juvenile plant transplants grow well. Furthermore, this method can cure soil of mold, fungus, among other infections.
There have been some arguments about whether or not you should sterilize the soil, as you might sometimes repel necessary and good bacteria or other microorganisms.
My recommendation is to sterilize the soil, as it offers more benefits than disadvantages, including:
- Makes your soil ideal for better growth and development of your plants
- Eliminates chances of growing fungi, gnats, nematodes, pathogens, and other damaging things
- Boosts your soil fertility to grow quality plants
- Requires less time, money, and effort to sterilize your soil compared to treating damaged soil from ignoring sterilization
How to Sterilize Soil So Nothing Will Grow
Now that you know why you should sterilize your soil, let’s get into the methods and steps to follow!
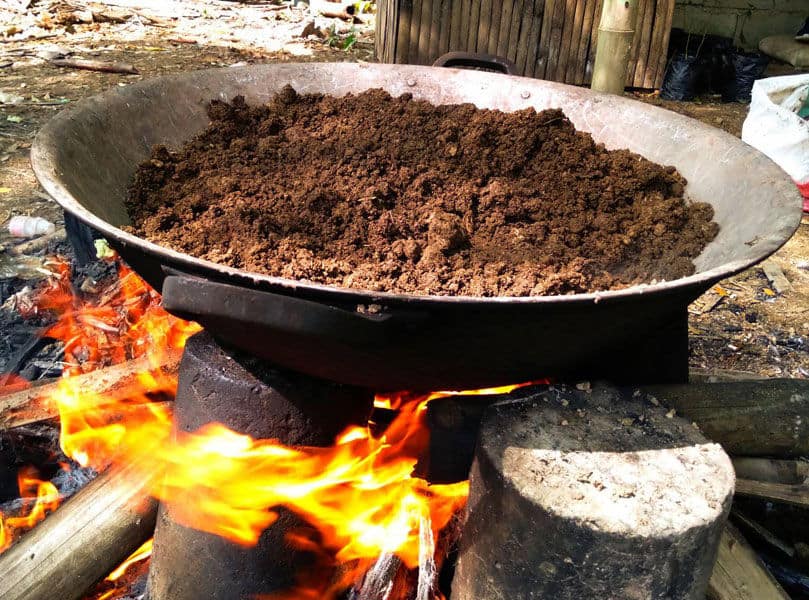
1. Heat
Most gardeners would use this method, being more effective compared to other soil treatments. When sterilizing soil with heat, you simply heat the soil and raise its temperature. You can use steam, dry heat soil directly, or heat soil to the threshold, which can kill harmful fungi, weed seeds, and other microorganisms.
When maintaining the threshold heat time, the internal soil temperature will reach a certain point, becoming unsuitable for pests and weeds. It’s best to heat soil for at least half an hour to prepare it for pots.
However, be sure to balance it out, as excessive soil temperatures can boost phytotoxicity in various organic compounds!
You can either use boiling water, steam, or even use your oven, pressure and non-pressure cooker, or microwave to sterilize your soil with heat. It depends on how much soil you’ll need to sterilize.
In my opinion, steaming soil is a quicker way to sterilize it, though it requires at least half an hour to prepare your potting soil and boiling water. Be sure to boil water up to 180 degrees F for your cookers, or 180-200 degrees F for your oven and microwave.
2. Solarization
When you have to sterilize a huge amount of soil, you can do solarization instead, which can purify the entire garden or field.
A common way to perform this method is to cover your garden or field with a few plastic layers, which increase your soil temperature since it would absorb the sun rays and heat.
There are also other ways you can trap heat, such as keeping pot soil in the bottom and top plastic layers. If you have a small amount of soil to sterilize, then you can use Ziploc bags, keeping them under the sun.
Make sure that you use transparent plastic rather than colored or black plastics, which deflects the solar energy. Transparent is the way to go, and thinner plastic, though there’s the risk of winds and animals destroying it.
Furthermore, make sure that you prepare your mineral or potting soil before you cover it with plastics, removing all litter and breaking clods up from the soil. With potting soil, spread it over the plastic layer so plastic edges are at least 6 inches away, then secure the coverings with heavy items at the edges.
You can keep the plastic on for 4-6 weeks during the summer days, but with aloof weather where wind and cloudy days are common, keep the plastic on for 8-10 weeks.
3. Hydrogen Peroxide
Some may think that this is a tough method to follow but it’s actually easy to do! When sterilizing soil using hydrogen peroxide, follow these steps:
- Fill a bucket of water and mix hydrogen peroxide in it, then place it in a sprayer. I recommend using 3% or 35% hydrogen peroxide for the best outcome
- Spray the solution to your soil. Make sure that you are wearing protective gloves and clothes as you spray the solution to prevent injury and burns
If you want to learn more about how to sterilize soil so nothing will grow, check out this interesting video:
Wrapping It Up
Soil sterilization is an important process that can benefit you and your plants in the long run. As long as you know how to do it correctly and use the right methods, you can enjoy high-quality soil that is free from pests and other growth that can affect your plants’ growth.
I hope that this guide on how to sterilize soil so nothing will grow helped you out! Don’t wait any longer and begin sterilizing your soil the right way with these tips.